Apple Vanilla Jam - a morning delight for your tastebuds
Apple Jam is my all-time favourite homemade jam as it is quick to make and always super delicious. It is the perfect mix of sweet and sour delight!
Green apples or Bosskop, Elstar or Cox Orange are great for making jam as they are juicy and come along slightly more sour than the regular kinds.
"Good aged" Cox Orange apple is my preferred kind, but you can simply use what you have on hand; the main thing is that the apples are nice and juicy.

Shopping list: 1 kg Apples, 2 big pears, preserving sugar
Seasoning: Vanilla (fresh or vanilla in the mill), cinnamon, 1 lemon or 1 &1/2 lime, clove
And we need vacuum-sealable jars
Let’s start right here with:
Washing, Peeling and coreing the apples and pears. So that we have at least about 1 kg of clean fruit cut into small pieces (about 2x2 cm pieces) on the scales.
We add 500 ml of water to a pot, add the sliced fruit, cover it, and bring it to a boil.


As soon as the fruit is boiling, we squeeze in half a lemon. The lemon or lime provides a fresh golden yellow colour and adds a slight tang just to ensure the jam doesn't become overly sweet.
Stir the fruit in the pot often and make sure nothing sticks to the bottom. If something burns or gets stuck, quickly put the entire contents into a fresh pot and just continue cooking, acting as if nothing had happened. :)


By the way, we cook the fruit until it becomes soft and begins to fall apart. The water should be nearly cooked away. Depending on the type of apples you are using (my fruit is juicy and strong flavoured), that I am good add another 100 ml of water, to mak the next step easier.


If you like large pieces of fruit in the jam, you can skip the next step!
I like my apple jam to be silky and melting on my tongue. If you agree, we take a bowl and a small pot for the next step.
>> Weigh the bowl because that is important for the next step<<

Press the hot fruit through the sieve with a stirring movement - the bigger the sieve, the easier it is! I currently have this miniature sieve, which takes a little longer but works somehow.
Run the spoon along the bottom now and then so that the puree flows nicely through.

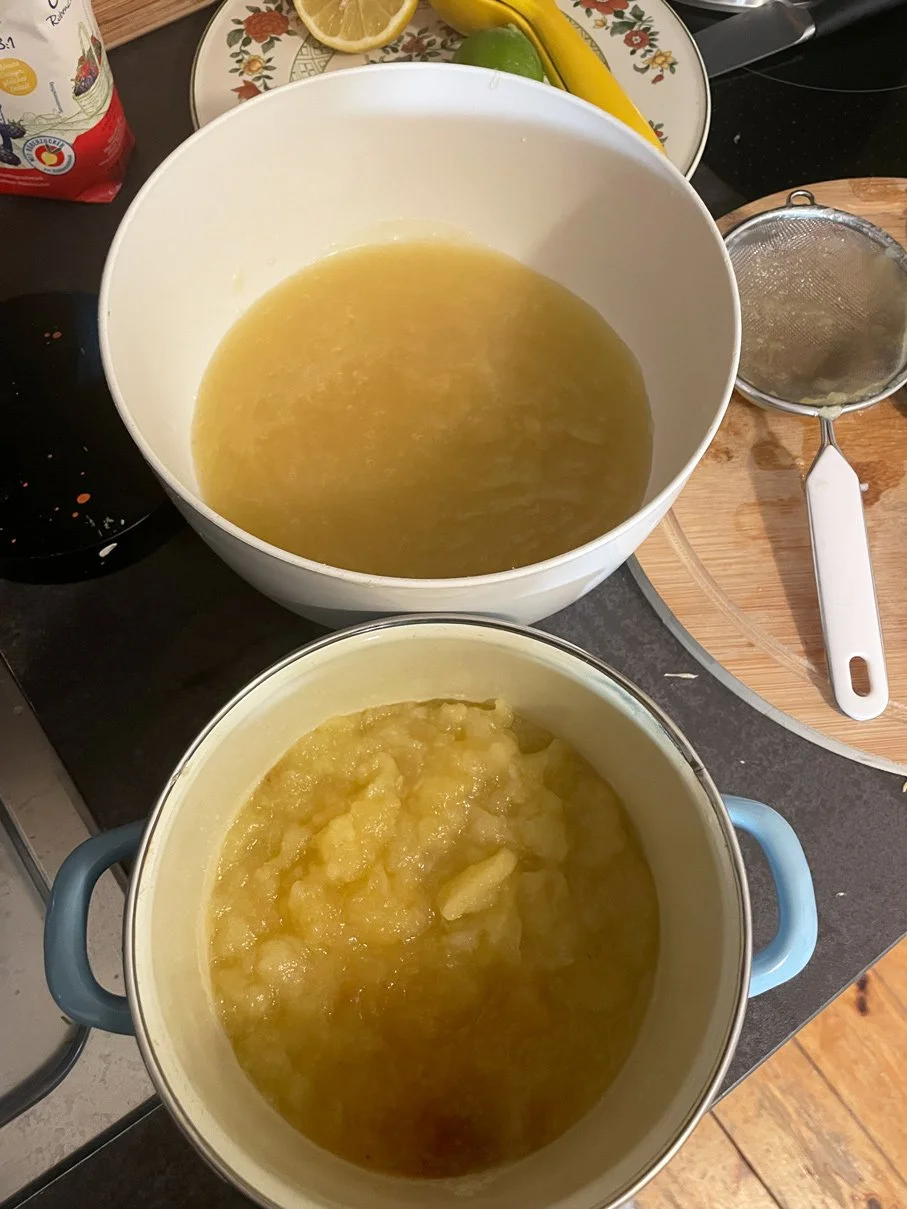
In the blue pot, we are adding the firmer part of the apple, which will be part of tomorrow's lunch and the following recipe, which is a real treat on rainy days.
Here is a little hint for you:
Some people like to eat it alone as a dessert.
It is pretty famous here in the Frankfurt region and a real culinary delight on cold and rainy days - also served at most Christmas markets.
Can you guess?
And back to our puree!
We weigh the bowl, including everything, to calculate the amount of preserving sugar. Don't worry! It's not rocket science!

Place the bowl on the scale, then we subtract the weight of the bowl from the total.
for me, it is a total weight of 840g on the scale
840g total weight
- 160g bowl
= 680 g ÷ 3 (divided by three because it is a 3:1 jam sugar/preserving )
= 226g
So, a total of 225g of sugar is needed to make the most delicious jam.
Back into the large pot now we add another 1/2 a lemon, cinnamon, clove and vanilla. Keep the pot on the stove until the fruite puree simmers, then we slowly add the preserving sugar while stirring constantly, preferably with a whisk, and let it boil for 2-5 minutes - keep stirring so that nothing burns!


Big bubbles similar to caramelized sugar bubbles are the sign that our jam is done! We are good to remove the pot from the heat and do the jam setting point test.
The Jam Setting Point test or simply called the Jelly test:
We take some of the mixture onto a spoon and place it on a cold plate. When the mixture thickens by cooling down, the jam is ready to be bottled. The jam will firm up as it cools but will take a few hours in the jar.
If you like your jam very firm and not too sweet, you can also add gelatin plates to the pot! But be careful; the jam needs a few hours to harden, and with the addition of gelatin, it is no longer vegetarian.


To prevent the jam from cooling down to quickly I keep the pot on the low flame setting.
Rinse the jars with boiling hot water so that they are preheated, clean, and no mold is able to form. I simply place the glasses in the sink and pour boiling water over them. While having an eye on the pot and stirring occasionally.
Now, with the jars ready, we are finally good to remove the pot from the stove - fill the jam immediately into the hot jars and quickly put the lid on. It is best to use jars that draw a vacuum to store the jam for as long as possible. I usually do not brag, but I am the proud owner of a wild collection of jars from store-bought cucumbers, vegetables, jam and honey in the cabinet, which comes in handy on occasions like today.

You can also try the recipe with different kinds of fruit!
To put it in short words: clean the fruit - bring it to a boil with some water - sieve it or put it in the mixer - add preserving sugar, and bottle it!
Only strawberries are a bit stubborn, so it's best to store the jam in a dark place or freeze it so that the colour stays nice and intensely red.
I wish you to have great fun cooking and preserving 🫰